
Saturday 24 April 2021
Saturday 20 March 2021
Video Series: Configure VLANs, InterVLAN Routing, and VoIP with Cisco CME
This blog post is a result of the incredible number of views I've noticed on this article, Cisco VOIP Phone Setup in Packet Tracer, I shared some years back. I have had numerous requests to share the file and have done so but that is only just an initial basic setup.
I have since done some updates to this tutorial and have created a series of video tutorials which I share on my Youtube page.
To ensure best network design and implementation practice is followed, I decided to throw in VLANs and InterVLAN routing into the mix. This is to ensure that Voice traffic is put into its own VLAN. You can later add QoS (MLS, CoS) if you want to which is necessary if you're doing this in an actual physical implementation. The main idea behind this series of videos is to help you begin off with a blank Packet Tracer network, setup the network, configure basic settings, configure VLANs, and then interVLAN routing, and finally end with VoIP functionality added to the network.
You can now easily follow through this series of video tutorials to learn how to configure VLANs, InterVLAN routing and VoIP. I decided not to narrate the videos. If you want to learn about the concepts please visit the Cisco Learn site or take networking classes offered on Coursera, Teachable, or the many other sites that do this. My main objective is how to do it, not the why you do it this way, many courses out there will help you learn the theory.
How to make the most of this tutorial?
Open a blank packet tracer file, begin with Part A and follow along. You can pause and play the video as you setup and configure the network.
Part A: Setup network
Part B: Configure basic settings for devices / Part C: Configure VLANs
Part D: Configure InterVLAN routing
Part E: Configure VoIP
Thursday 18 March 2021
Mobile internet prices in Papua New Guinea: still no downward movement
Mobile internet prices in Papua New Guinea: still no downward movement
This blog post updates ongoing monitoring of mobile internet prices in Papua New Guinea (PNG) by presenting data for the second half of 2020. For background, see an earlier post at the start of 2020 that suggested an overall decrease in prices from mid-2016 to late 2019, and a post in mid-2020 that showed no change in the first half of 2020.
Since the start of 2020, price offerings have been noted each Monday using menus in mobile telephones. This method captures pricing changes within one week of them being made available to consumers. The main motivation for this research has been to monitor whether there is any noticeable change since the Coral Sea Cable System was officially launched in December 2019.
Read the original blog post in Devpolicy Blog.
Saturday 6 March 2021
Do you know about the PNG Cybercrime Act 2016
 |
|
Cyber Crime by Nick Youngson CC BY-SA 3.0 Alpha Stock Images |
It would help ordinary PNGeans to at least know the different forms of cybercrime divisions and specific offenses captured in this Act. Having that knowledge informs our general populace to be able to take action when they see or hear about cybercrime.
I created an infographic summarizing the offenses listed in the Act and what divisions they come under. Details of these offenses and their related penalties can be found in the Act (pdf) itself. You could even visit the PNG Law Review site to know more about the Act.
PNG Cybercrime Offenses Infographic (click here to view a larger version)

Thursday 25 February 2021
For you my dear friend...

- International Standard
- Pastoral Care
- Community Engagement
"Cor ad co loquitur: Heart Speaks to Heart" is a phrase taken from a letter from Saint Francis de Sales to one of his spiritual directees. A phrase that he wanted us to embody in every aspect of our teaching life. To be a great teacher, you have to speak from your heart to the heart of your listener.
I will be forever grateful to the Good Lord for the work He has done through you in my life and the lives of all the young men and women especially in this beautiful country of PNG that you dedicated your 18 years of live and service to through DWU.
May God be glorified.
Tuesday 19 January 2021
Raymond's tinkering project
I brought my 5 year old one-piece to the office today and after completing his daily math homework and doing a bit of drawing, I decided to give him some easy-tac adhesive. Beginning of this year I've spontaneously begun to give him and the elder sister math and spelling exercises weekly and leave them with what I call a 'tinkering project'. I give them some random objects and tell them to create something out of it.
So this morning after his homework I gave a small piece of easy-tac and just told him to do something with it. He came with an interesting thing which I could not work out at first what it was. I had to ask him to explain to me what he came up with in his tinker project. He then explained to me that what he did was a model of the corona virus. I laughed at first wondering how a 5 year old would even know what the virus looks like but then remembered that this was a product of what he sees everyday on the news, the posters, the paintings on the fences in town and perhaps the posters in front of the Diwai Mart. I immediately knew that children as young as him observe every thing around them, whether it be good or bad, and they like to imitate or replicate that in their own way.
 |
| Figure 1. Raymond with his Corona Virus Model |
 |
| Figure 2. He explained that the white was the core or the nucleus and the spikes were made out of toothpick. |
Friday 15 January 2021
My very recent seafood allergy experience

On Tuesday 13th January 2021 my wife and I decided to walk out to the nearby Gov Stoa market, just outside the DWU front gate. It was around 7.30 in the morning and usually women from this settlement, and nearby Kerema compound bring their goods to sell at this makeshift market early before the sun starts giving off its first strong rays. We bought some stuff and were about to head back when she saw an elderly lady selling smoked fish laid out neatly over small patches of banana leaf on top of a container. She was casually waving what appeared like a magic wand over the fish to make them disappear, no (I had wished that later on during the day) she was just making sure the nasty little Musca domestica (scientific name for House flies..hehe) were kept at a safe distance from the fish.
Monday 30 November 2020
Studying Online: Tips

Monday 23 November 2020
DIY: Christmas Star Light
DIY Christmas Star Light
It is the time of the year again when families start decorating their homes with Christmas lights and décor to celebrate the festive season. The star is a special symbol of Christmas for our family as it reminds us of the birth of our Savior – Jesus Christ, the Star of Bethlehem. Thought I should share a DIY on how we built our own inexpensive star light.

Items:
- Battery powered LED lights (100 LEDs)
- Triangle dimensions 58cm x 50cm
- Blade or Scissors
- Cardboard
- Tape measure or ruler
- Screw driver to poke holes in the cardboard
Make the star
The first step is to make a star with two triangles cut from cardboard. I honestly did not measure out the triangle I wanted to create however the size of the cardboard determined the size of the two triangles. I had to be careful so the entire piece of cardboard I had was enough for two triangles.
I realized later that you have to measure your cardboard according to the number of LED lights you have. That could be a good way to measure as you want all the lights to fit perfectly on your star.
The LED lights were bought from a local shop in town for K15.00 and it had a total of 100 LEDs. To ensure the 100 LEDs fitted perfectly to form a star light, you may want to measure your star with these dimensions.

2. Glue both triangles to form a star.
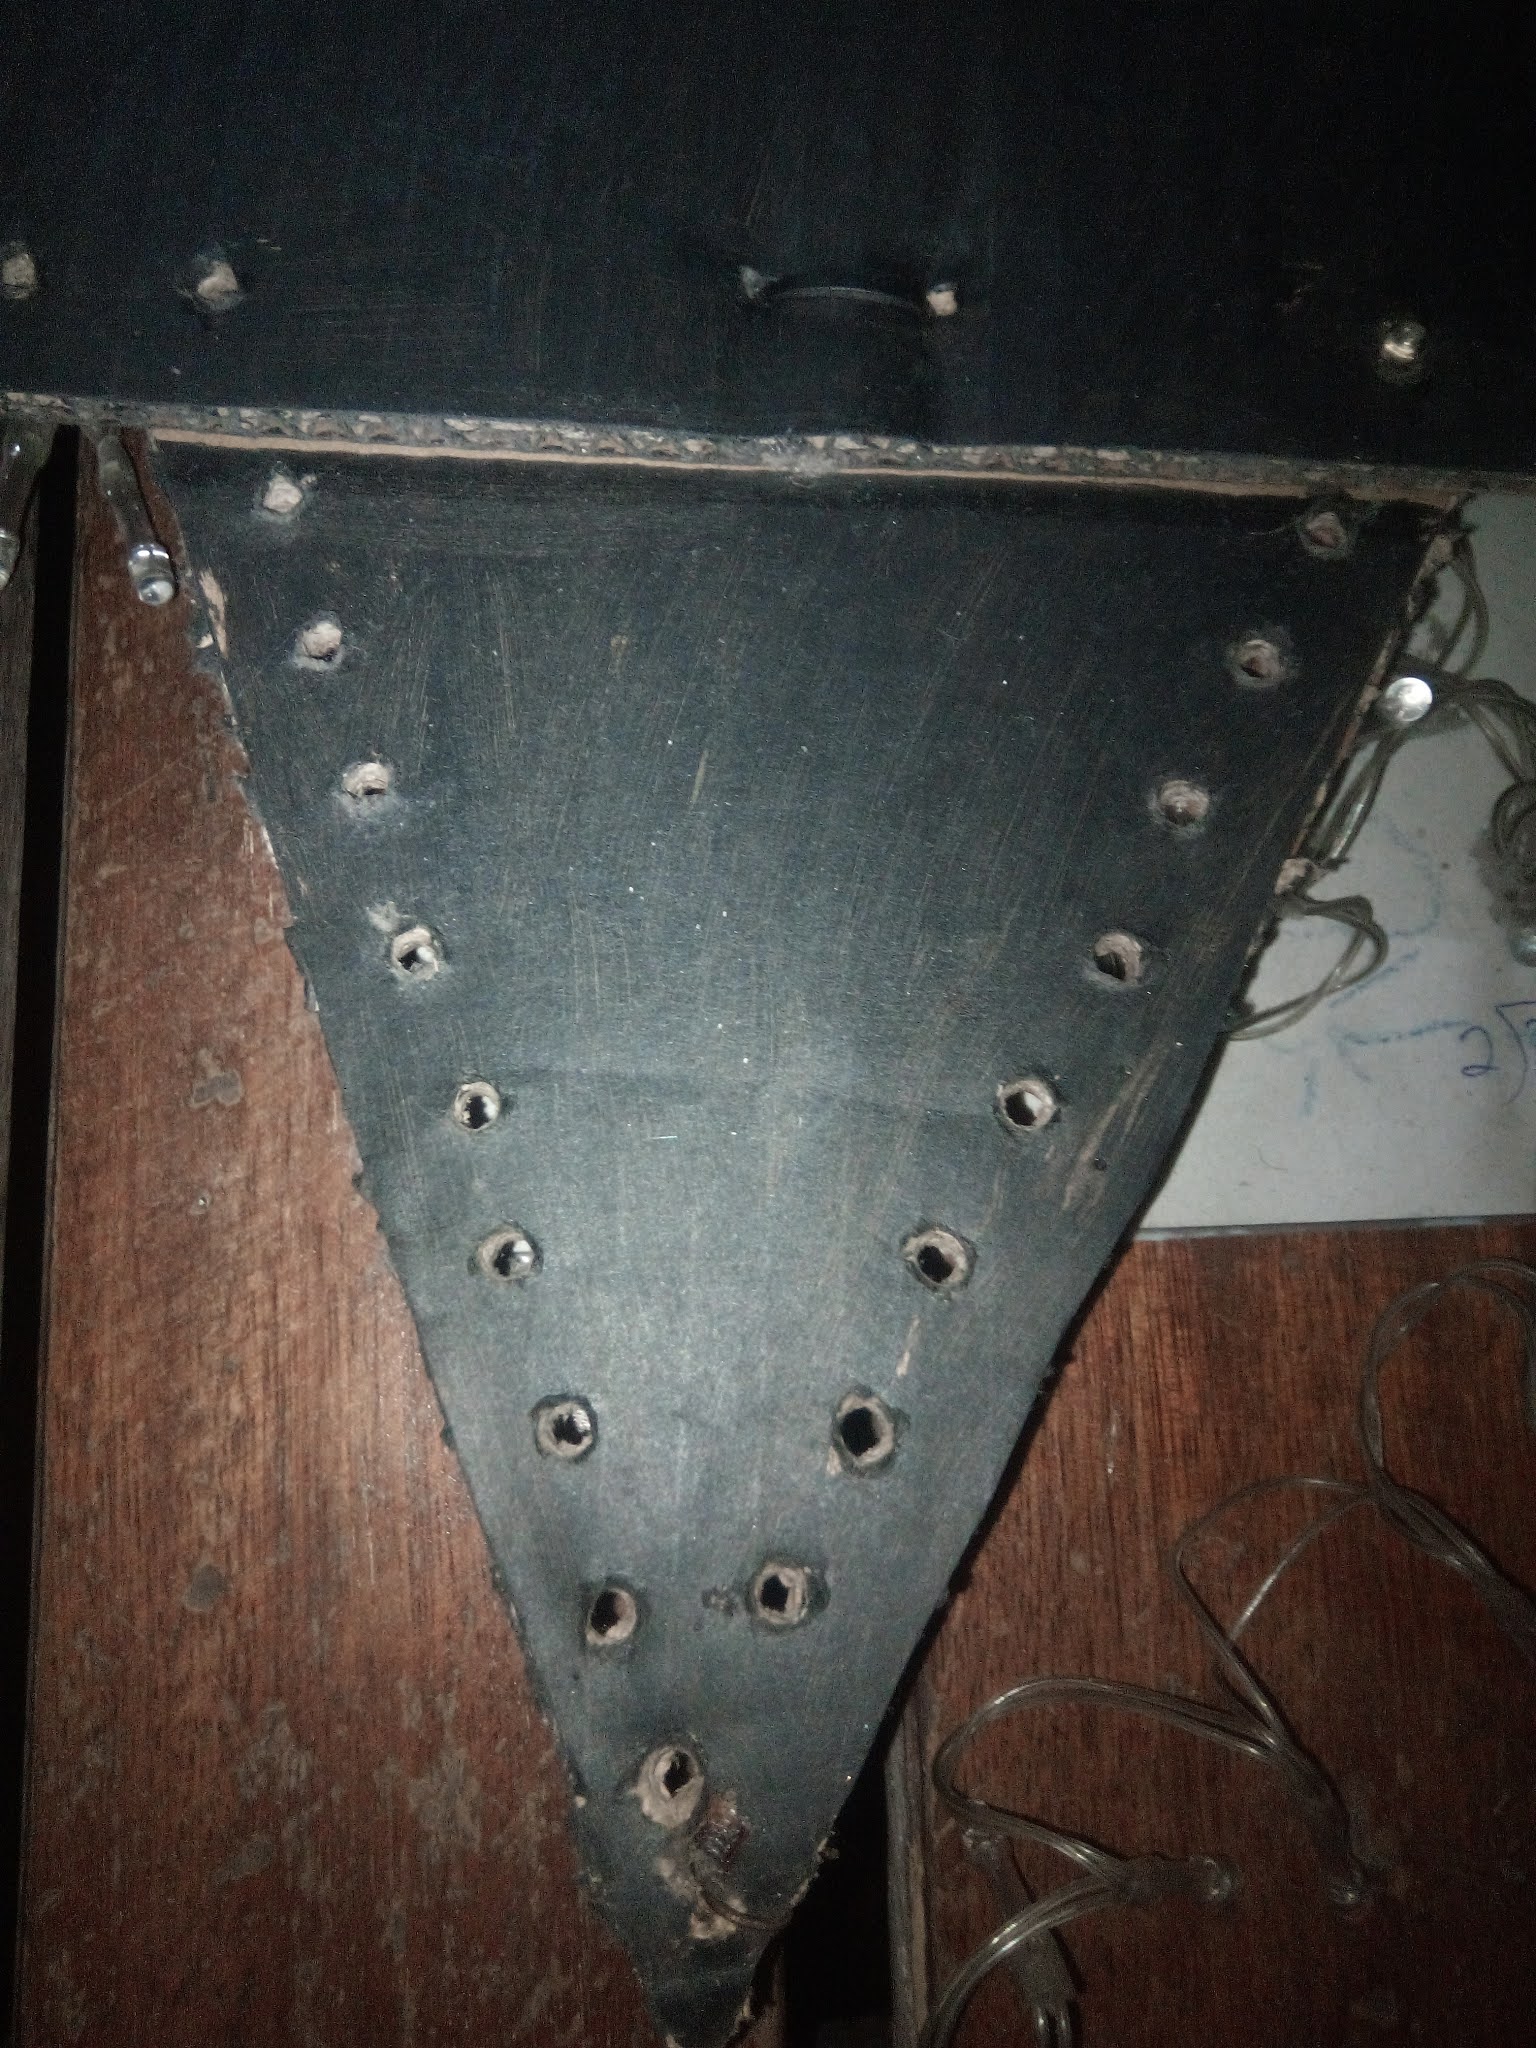
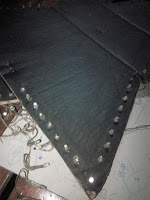
I had no glue so I used two cable ties to hold the triangles together. Once done, I used left-over black paint to coat the entire surface of the star with black paint. The idea was for the star to fade into the dark night and let the lights shine out.
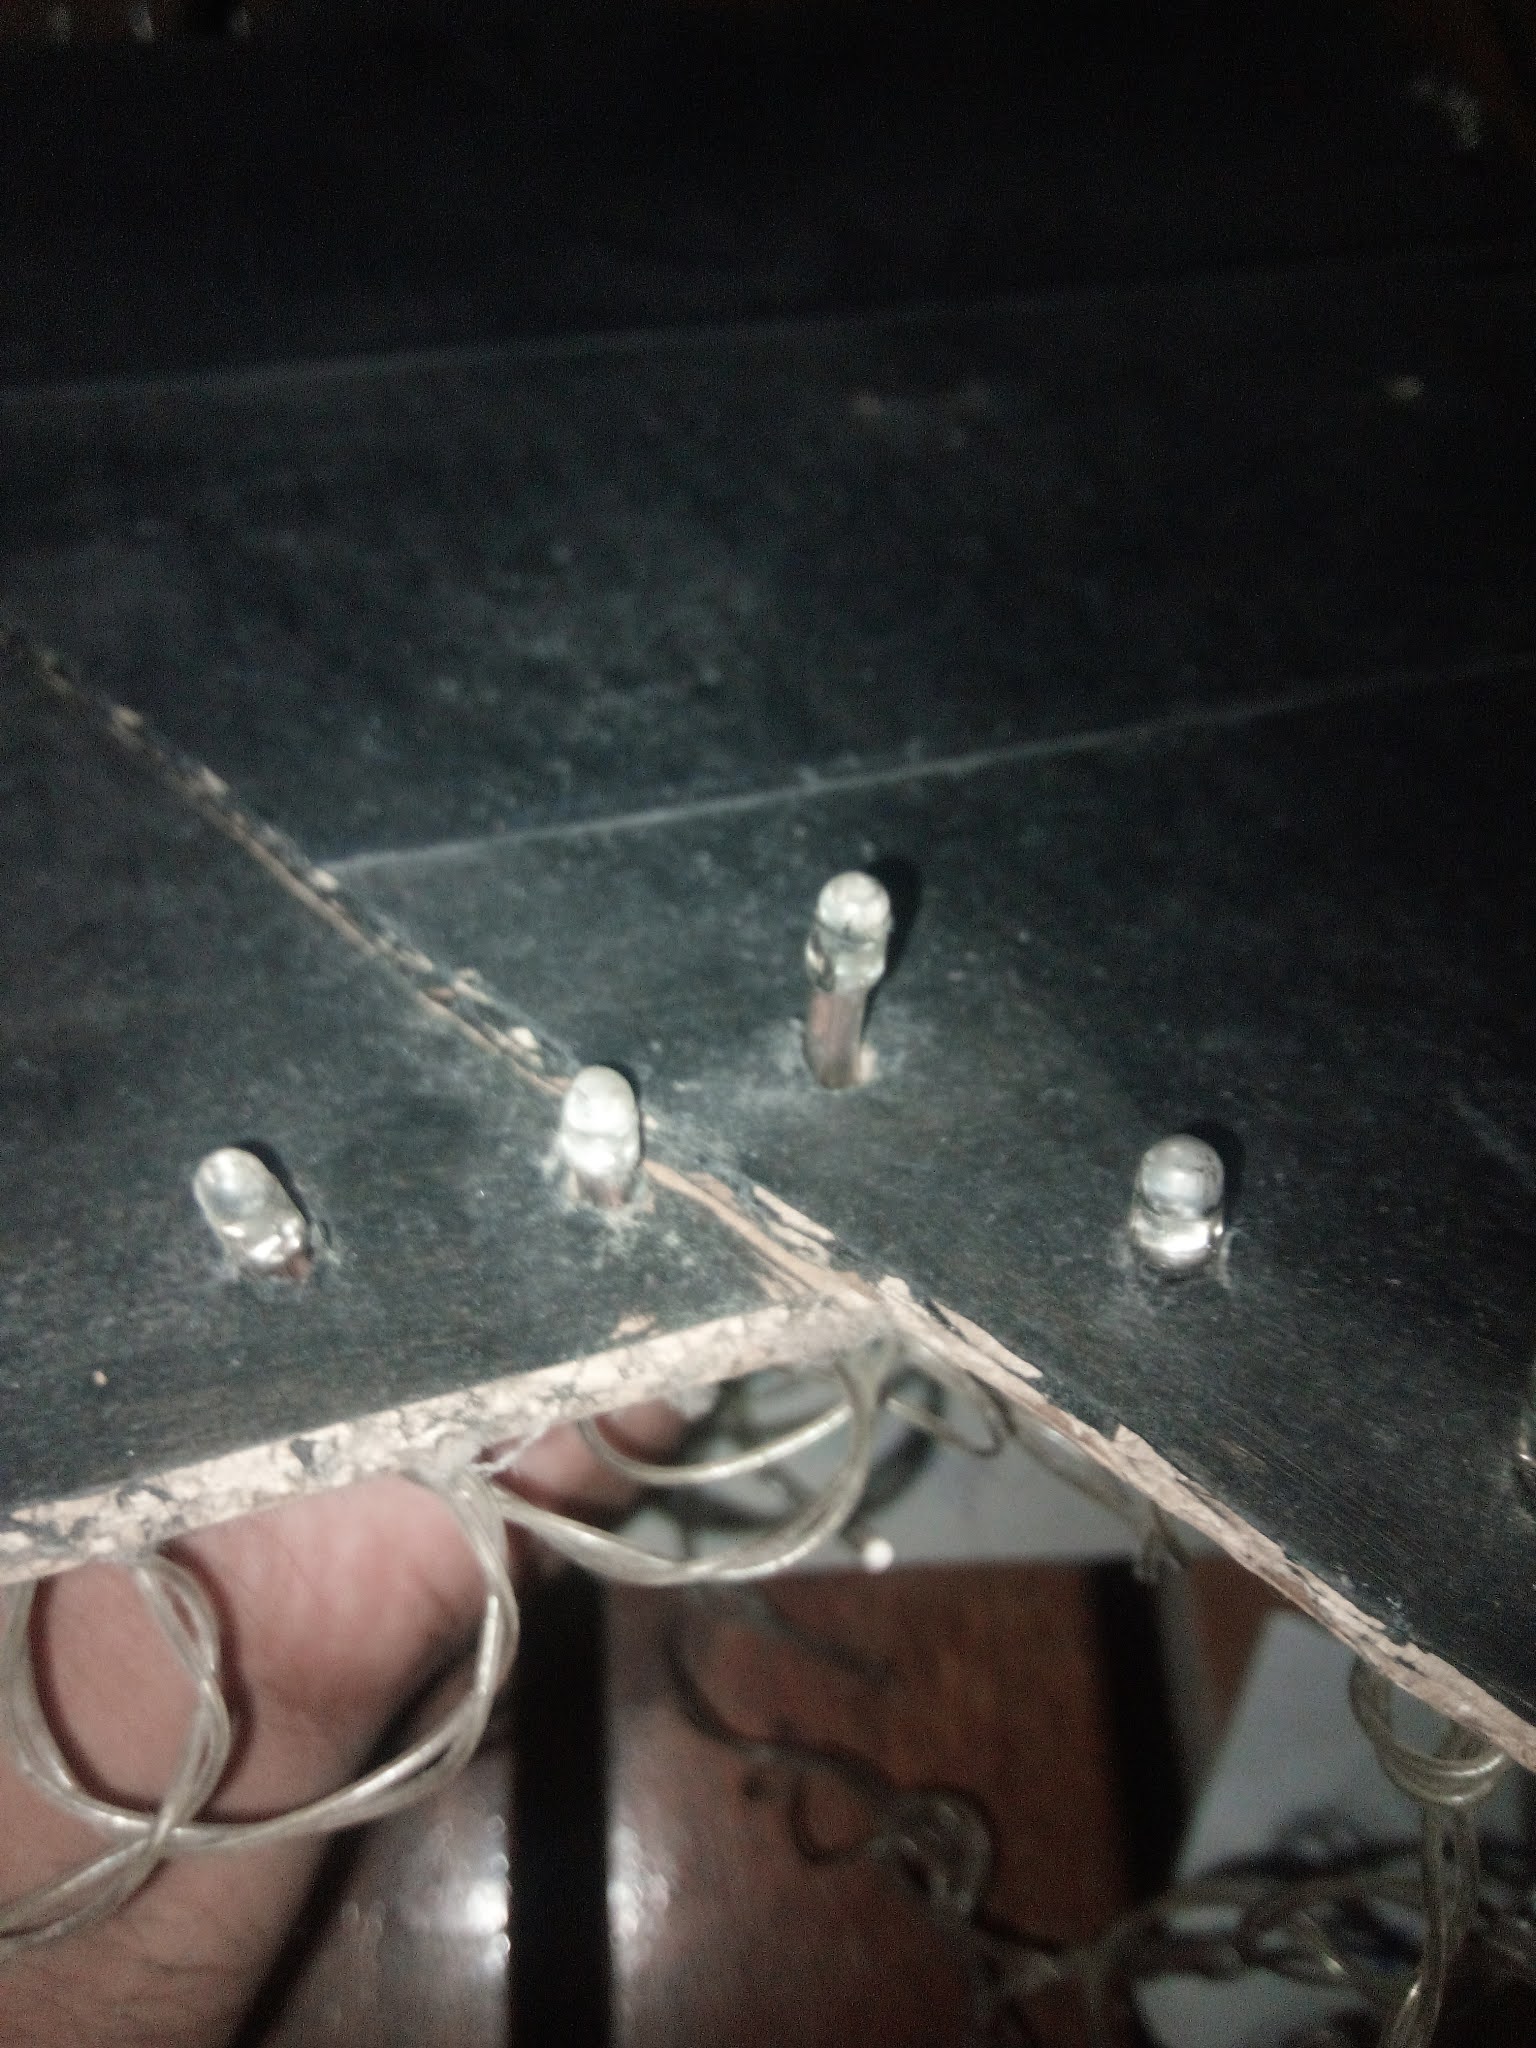
3. Make tiny holes on the edge of the star
So the next thing is to start poking holes using a screw driver on the edge of the star so you can fit all your LEDs. I didn't really measure out the tiny holes through which each light will fit but it turn out quite well (surprised myself with that). A perfect combination would be something like this (pic on right) that makes use of all 100 LEDs.

4. Start to fit the LED lights.


Once all done you can now test your star light.
Sunday 15 November 2020
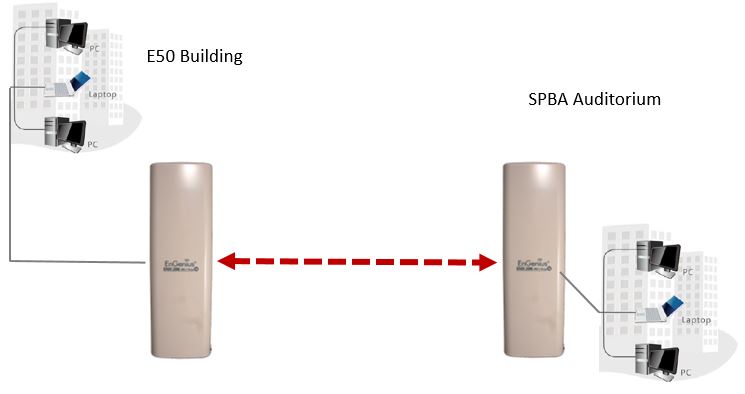
Setting up a bridged network with ENH200
Configuring the Engenius (ENH202) as a bridge using WDS mode.
What is WDS Bridge Mode?
In the WDS Bridge Mode, the ENH202 can wirelessly connect different local area networks by configuring each device's MAC address and security settings. The WDS Bridge Mode can bridge up to four local wired networks together as one logical network. Every computer on this logical network can see each other, sharing files as if they are in the same location. With 600mW output power and MIMO antenna technology, the connection distance can extend beyond 1000 feet with good performance, assuming the antenna are within line of sight (LoS). The WDS bridge network is a MAC-based network that provides transparent bridging. Source: ENH200 Manual
 |
| WDS setup. Source: ENH200 Manual |
Lab Topology:
 |
| The lab topology for this tutorial. |
Device model: Engenius ENH200 device (802.11 b/g)
The chart below will indicate to you what data rates and frequencies this model supports.
 |
| 802.11 b/g supports 11-54mbps and operates at 2.4GHz. |
Scenarios where this topology can be applicable.
- WDS Bridge mode for point-to-point wireless bridging
- Linking two buildings
- IP camera that has no wireless capability
- Linking main house to guest house
- Once you understand the functionality, you can be able to apply it to other suitable use cases.
Components of this setup.
To begin, take note of the top MAC address labelled on the back of the device

Each device has a mounting hardware/bracket which is used for clamping the device to a pole.

Cabling
- Use CAT5/6 STP (shielded) or better. Using UTP will not provide protection against ESD.
- Also protects against EMI and other RF interferences
- If possible run cables inside the pole (or conduit) to help insulate from any air surges of static
- Never coil excess cable which lowers impedance.
- Make sure your electrical system is properly grounded.


Other accessories
May be included to ensure resistance to dust and water. These have to have IP65 grading.


 |
| Newer dual band devices support PoE pass-through on the secondary Ethernet port. You can use this port to tether (add it to the port) an IP camera. |
 |
| PoE Injector (24V or 48V) |
- Let’s configure the EnGenius Wireless Bridges using the web browser to access the interface of the device.
- This is where my students took over on the documentation
The screenshots for the steps below were done by Mark W., Solomon G., Bentley B. and Jonah W. (IS3 students of 2020).
This is a tutorial designed specifically for IS304 Module 13 WLAN Configuration class.
Group Name: Solomon Garu, Bentley Besuin, Jonah
Wo’otong and Mark Winduman.
Date: 28-05-2020
(Thursday)
NOTE: Settings configured here are meant to emulate a mid-long range P2P wireless bridged network.
Let’s configure the EnGenius Wireless Bridges using the web browser to access the interface of the device.Reset EnGenius ENH200 router to factory defaults
To reset the EnGenius ENH200 to its default settings, you have to do the following steps:
- Turn on router
- Press Factory Reset button and hold for at least 15 seconds
- Device restarts automatically
- Default settings have been restored

The unit will reboot automatically. Once the power light stops blinking, the unit has been reset and is ready to use. Resetting the router does not reset the firmware to an earlier version, but it will change all settings back to factory defaults.
Step 1: Access device using a wired connection.
Connect the Network Cable end to a laptop. Ensure the laptop has an IP in the range 192.168.1.2-254 /24
Using a web browser, type in the default IP address of the device.
Default IP: 192.168.1.1
Username: admin Password: admin
Step 2: Note the MAC addresses of both devices.
Note down the MAC addresses of both devices by looking at the either the back of the device or when you log in to the device it should be in the main page under System Information.

Image main page / system info:
